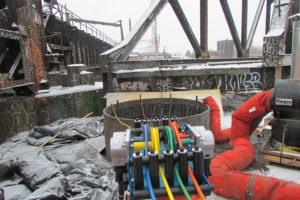
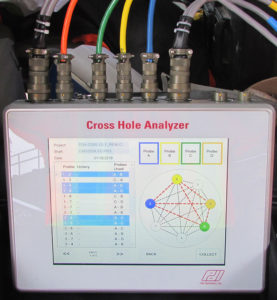
 C“ross Hole Sonic Integrity Logging” or CSL testing is used to assess the quality and consistency of the installation of the concrete inside the reinforcement cage of a caisson or secant walls. Sonic integrity testing is conducted according to the ASTM 6760 standard in effect, “Integrity testing of concrete deep foundations by ultrasonic crosshole testing.”
The transmission of ultrasonic pulses through concrete from one probe to another is used to assess the integrity of the caisson’s structure. The combination of profiles from testing serves to locate and determine the importance of defects, imperfections or anomalies, if such is the case.
The assessment of the integrity of a caisson takes into consideration the increase of the travel time of the signal from the transmitter probe to the receiver probe, that is to say, the “First Arrival Time (FAT)” and the weakening of the signal, in relation to the travel time of the signal or the energy in the area adjacent to the intact concrete.

The calculation of the distance between the transmitter and the receiver by the FAT value is an estimate of the travel speed of the wave, which is also a relative indicator of the quality of the concrete.
Proper installation of auscultation tubes is essential for integrity testing and data interpretation. When the tubes are equidistant and parallel with one another and the concrete inside the caisson is uniform between the testing tubes, the FAT should be regular and therefore demonstrate a more consistent wave speed and a good signal strength. For concrete that is not uniform, contaminated, or contains air holes, empty spaces or inclusions, the signal will show delays in travel time or a reduction in intensity of the signal.
This integrity testing method does not indicate the exact nature of a defect, but rather an evaluation of the quality of the concrete that has been installed. The method is limited to the concrete between the auscultation tubes and the depth being inspected, the depth simultaneously accessible by the CSL probes, between the pair of tubes that define the section. No conclusion can be drawn from this testing method related to theportion of the section underneath the auscultation tubes, or the section outside the reinforcement cage.

Thermal integrity profiling tests (TIP) use the hydration heat produced during the cure of the concrete mix in order to assess the integrity or the quality of the concrete inside deep foundations. Thermal integrity profiling tests are conducted in compliance with the ASTM D 7949 standard — “Thermal Integrity Profiling of Concrete Deep Foundations” — in effect.
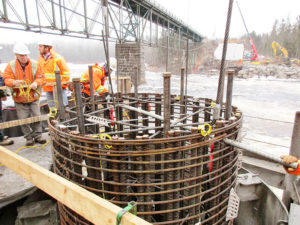
TIP testing through thermal wire is used to measure the temperature of the concrete in a caisson along its full length at predetermined time intervals and during the entire cure of the concrete. The thermal wires contain digital temperature sensors spread equally along the wire. These wires are attached to the longitudinal bars of the reinforcement cage and they are equally distributed on the perimeter of the cage.
The proper installation of the thermal wires is essential to the testing and the interpretation of the data.
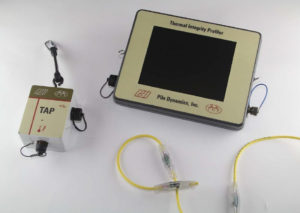
Each thermal wire is connected to a continuous data collection port (TAP BOX). The data that is recorded during testing is transmitted to the TIP Main unit. A qualitative assessment of the graphic representation (temperature relative to depth) is often enough to indicate if the caisson shows any issues of integrity or presents any defects. This evaluation can be carried out at the time of data collection on the site.
The data gathered by the TIP system is uploaded to a computer to be analyzed by the TIP Reporter program. The program displays the temperatures measured over time according to depth, and also presents cross-sections of the caisson at the depths pre-determined by the user.
Because the testing is based on the temperature generated during the cure of theconcrete, the TIP tests should generally be conducted between 4 and 72 hours after the installation of the concrete.

The maximum hydration heat measured by the thermocouples in the caisson vary according to the diameter of the caisson, the type of mixture used, the placement of the reinforcement cage in relation to the centre of the caisson, the time elapsed from the moment the concrete was installed to when the measurements were taken. These factors can cause variation in the average temperature recorded by the sensors situated at the same elevation in the caisson.
Taking measurements during thermal integrity profiling tests makes it possible to estimate the true shape of the caisson. These estimates can be compared with the notes taken at the site during the installation of the concrete, in order to confirm the general quality of the concrete inside the caisson.
A decrease in temperature (a colder than average section) could indicate a reduction in the diameter of the caisson, water infiltration or poor quality concrete.
An increase in temperature (a warmer than average section) could indicate a bulge or more significant concrete cover of the reinforcement cage.
A gap in temperature between the sensors located at the same level and diametrically opposed could indicate a problem with the alignment of the reinforcement cage or a problem with the concrete cover surrounding the reinforcement cage.
Unlike CSL tests, thermal integrity profiling tests can be used to assess an entire caisson including the area outside the reinforcement cage.
In addition, thermal integrity profiling using thermal wires tests are not affected by the winter weather. Indeed, the water management required for the realization of the CSL tests can be complex when these tests are performed at outdoor temperatures under the freezing point.
PDA CONSULTANTS INC. engineers’ team offers other services such as dynamic analysis of pile driving (PDA) and the supervision of deep foundations, training and consultation. Contact us today to benefit from our services.
